
How Long to Leave Hair Dye In?
Getting beautiful hair color often comes down to precise timing. The golden rule is always to follow the instructions on your specific dye box, as timings vary significantly by product and hair type. Factors like your hair’s porosity, current color, and the type of dye (permanent, semi-permanent) all influence how long to leave hair dye in for the best outcome. Always do a strand test to ensure perfect results and prevent over or under-processing.
How Long to Leave Hair Dye In?
Dyeing your hair at home can be an exciting journey, transforming your look with a fresh burst of color. But amidst the excitement, one question often sparks a bit of anxiety: “How long to leave hair dye in?” It’s a critical step that can make or break your hair color dreams, determining everything from the vibrancy of your shade to the health of your strands. Get it right, and you’ll be flaunting salon-worthy results. Get it wrong, and you might face patchy color, an unexpected shade, or even damage.
The truth is, there’s no single magic number that applies to every hair type and every dye product. It’s a nuanced process influenced by several factors, including the type of dye you’re using, your hair’s current condition, and even the temperature of your home. But don’t worry! We’re here to demystify the process, providing you with all the knowledge and practical tips you need to achieve beautiful, consistent results every time. Let’s dive into the essential guidelines for timing your hair dye perfectly.
Whether you’re going for a subtle refresh or a dramatic change, understanding the science behind processing times is key. This article will walk you through everything from reading the box instructions to performing a vital strand test, ensuring your next at-home coloring session is a resounding success. Say goodbye to guesswork and hello to gorgeous hair!
Key Takeaways
- Always Read Instructions: The most crucial step is to meticulously follow the timing guidelines provided in your specific hair dye kit. These instructions are tailored to the product’s unique formulation.
- Perform a Strand Test: Before applying dye to your entire head, perform a strand test on a small, hidden section of hair. This helps you determine the perfect development time for your hair type and desired color.
- Consider Hair Type and Condition: Porous or previously damaged hair may absorb color faster, requiring less processing time. Virgin or resistant hair might need the full recommended time.
- Understand Dye Types: Different dye formulations (permanent, demi-permanent, semi-permanent, bleach) have vastly different processing times, ranging from minutes to 45+ minutes.
- Avoid Over-Processing: Leaving dye in too long can lead to darker-than-desired results, dry or damaged hair, and scalp irritation, especially with permanent dyes or bleach.
- Prevent Under-Processing: Not leaving dye in long enough can result in patchy color, an undesirable hue, or simply no noticeable change, wasting your effort and product.
- Set a Timer: Once you start applying, immediately set a timer according to your box instructions or strand test results. Do not estimate, as even a few minutes can make a difference.
📑 Table of Contents
The Golden Rule: Always Check the Box!
When you pick up a hair dye kit, the very first thing you should do, even before you rip open the packaging, is read the instructions. Seriously, read them thoroughly! This might seem obvious, but it’s astonishing how many people skip this crucial step. Every hair dye formulation is unique, and manufacturers spend considerable time and resources developing precise instructions for their specific product.
Why Box Instructions Are Paramount
- Specific Formulations: Different brands and even different shades within the same brand can have varying chemical compositions. These compositions dictate the exact time needed for the color molecules to penetrate your hair shaft and develop correctly.
- Optimized for Results: The processing time recommended on the box is designed to give you the best possible color result – the shade you see on the model’s picture – while minimizing potential damage.
- Safety First: Following the instructions also ensures you’re using the product safely, reducing the risk of skin irritation or allergic reactions that can sometimes occur if chemicals are left on for too long.
Think of the box instructions as your personal hair coloring bible. They’ll tell you not only how long to leave hair dye in, but also how to mix it, apply it, and rinse it out. Ignoring them is like baking a cake without a recipe – you might end up with something edible, but it’s unlikely to be perfect.
Factors Influencing Development Time
While the box instructions are your starting point, several other factors can influence the ideal amount of time you should leave the dye in. Understanding these can help you fine-tune the process for your specific needs.
Your Hair’s Current Condition and Porosity
- Virgin Hair vs. Previously Treated Hair: If your hair has never been dyed or chemically treated (virgin hair), it might take a bit longer for the color to penetrate and develop fully. Previously colored or chemically treated hair (like permed or relaxed hair) tends to be more porous. Porous hair has a more open cuticle layer, which means it can absorb color more quickly. This often translates to needing slightly less processing time.
- Damage Levels: Damaged hair, with its raised and compromised cuticles, is often highly porous. It can soak up color very quickly, sometimes leading to darker or more intense results than intended if left on for the full time. It’s crucial to be extra cautious with damaged hair and consider reducing the processing time.
Desired Color Intensity and Shade
Generally, the longer you leave permanent dye in (up to the maximum recommended time), the more intense and saturated the color will be. For a subtle shift, you might lean towards the shorter end of the recommended time, whereas for a rich, deep hue, you’d go for the longer end. However, never exceed the maximum time listed, as this can lead to damage without further color deposit.
Room Temperature
Believe it or not, the ambient temperature of your room can play a small role. Warmer temperatures can slightly accelerate the chemical reaction of the dye, potentially leading to faster color development. While you don’t need to adjust your thermostat drastically, be aware that if your bathroom is particularly warm, your dye might process a little quicker.
Different Dye Types, Different Timelines
Not all hair dyes are created equal, and their processing times vary dramatically. Knowing the difference is key to understanding how long to leave hair dye in for each type.
Permanent Hair Dye (30-45 minutes)
This is the most common type for significant color changes, gray coverage, and long-lasting results. Permanent dyes use ammonia and peroxide to open the hair cuticle and deposit color deep within the hair shaft. Because of this chemical process, they generally require the longest processing time, typically ranging from 30 to 45 minutes. Never leave permanent dye on for longer than the maximum time stated on the box, as it won’t deposit more color but can cause unnecessary damage.
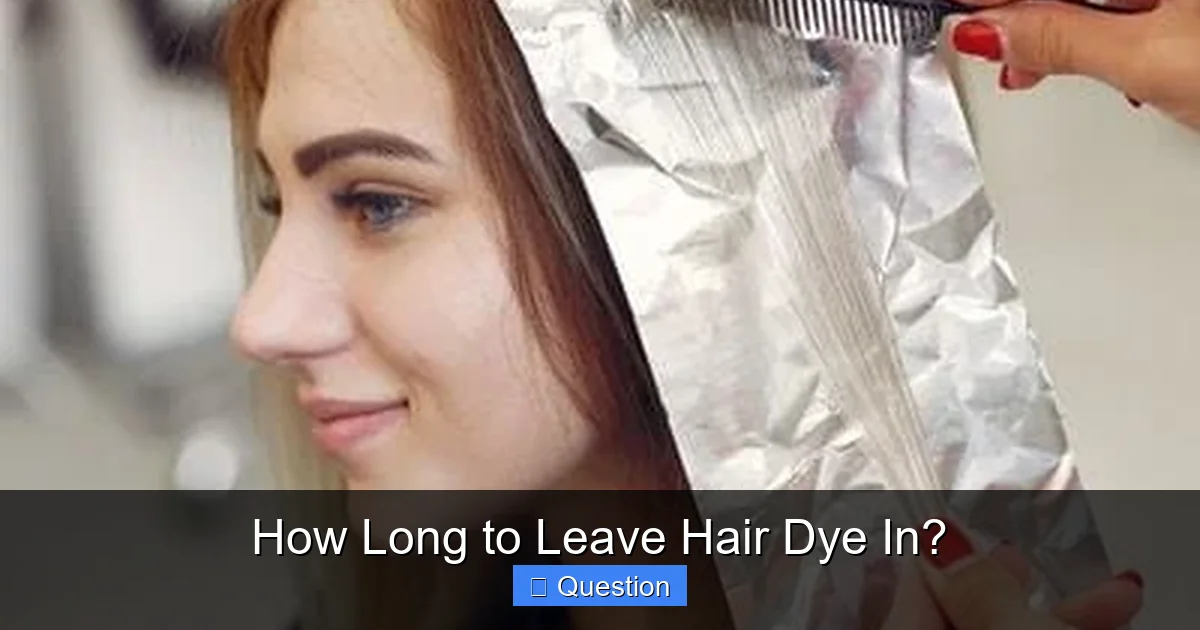
Visual guide about How Long to Leave Hair Dye In?
Image source: myglowjourney.com
Demi-Permanent Hair Dye (20-30 minutes)
Demi-permanent dyes offer a gentler approach. They don’t contain ammonia and use a low-volume peroxide to deposit color onto the hair shaft, rather than deeply penetrating it. They’re great for enhancing your natural color, blending grays, or refreshing faded permanent color. These dyes usually last 4-6 weeks and typically require 20 to 30 minutes to process. They fade gradually, making root lines less noticeable.
Semi-Permanent Hair Dye (10-25 minutes)
These dyes are the gentlest option, containing no ammonia or peroxide. They simply coat the outside of the hair shaft with color, washing out gradually over 6-12 shampoos. Semi-permanent dyes are perfect for experimenting with fun colors, adding a subtle tint, or boosting vibrancy without commitment. Their processing times are shorter, often between 10 to 25 minutes, depending on the desired intensity. Some vibrant fashion colors might even suggest longer for maximum saturation.
Temporary Hair Color (Instant to 10 minutes)
Temporary colors include sprays, chalks, and color mascaras. They sit purely on the surface of the hair and wash out in one shampoo. There’s virtually no “processing time” here; you apply and go! For some wash-out rinses, you might leave them on for a few minutes for a slight tint.
Bleach and Lightener (10-60 minutes, with careful monitoring)
Bleach is a whole different beast. It removes pigment from your hair, rather than adding it. The time you leave bleach on depends heavily on your starting hair color, desired lightness, and hair condition. Bleach can cause significant damage if left on too long. While it might start working in as little as 10-15 minutes, it can be left on for up to 45-60 minutes in some cases, but constant visual monitoring is absolutely essential. Always follow the product’s instructions and never exceed the maximum time, regardless of whether you’ve reached your desired lightness. If your hair isn’t light enough, a second bleaching session might be needed after a break.
Common Mistakes to Avoid When Timing Your Dye
Getting the timing right is crucial, but it’s easy to make mistakes. Here are some pitfalls to steer clear of:
Mistake 1: Ignoring the Strand Test
This is arguably the biggest mistake. A strand test involves applying the dye to a small, hidden section of your hair (like underneath your ear or at the nape of your neck) and checking its development every few minutes. It’s the only way to accurately predict how the dye will react with your unique hair and how long to leave hair dye in for your specific desired result. Skipping it is like gambling with your hair color.
Mistake 2: Under-Processing
Removing the dye too soon means the color hasn’t had enough time to fully penetrate and develop. This can lead to:
- Patchy or Uneven Color: Some areas might have taken the color, others haven’t.
- Dull or Lifeless Shade: The color might look muted or not as vibrant as expected.
- Unexpected Tones: Especially with bleaching or toning, removing too early can leave you with brassy or yellow tones.
- Poor Gray Coverage: Grays are notoriously resistant and need the full processing time to be adequately covered.
Mistake 3: Over-Processing
Leaving the dye on for too long, especially permanent dyes or bleach, can have more serious consequences:
- Darker Than Desired Color: Your hair might turn out significantly darker or ashier than the shade on the box, as the dye continues to oxidize past its optimal point.
- Hair Damage: The chemicals can strip your hair of its natural oils, leading to dryness, brittleness, breakage, and a lack of shine.
- Scalp Irritation: Prolonged contact with harsh chemicals can irritate your scalp, causing redness, itching, or burning.
- Fading Issues: Ironically, over-processed hair might struggle to hold color well in the long run, leading to faster fading.
Tips for Perfect Dye Application and Timing
Achieving professional-looking results at home is entirely possible with a little preparation and precision.
1. Do the Strand Test (Again, seriously!)
We can’t stress this enough. Mix a tiny amount of dye according to instructions. Apply it to a small, hidden strand of hair. Set a timer and check the color every 5 minutes. Once you reach your desired shade, note the exact time. This is your personal processing time.
2. Prep Your Hair Properly
Make sure your hair is clean and dry unless the instructions specify otherwise. Often, it’s recommended to dye hair that hasn’t been washed for 24-48 hours, as natural oils can provide a protective barrier for your scalp.
3. Section Your Hair
Divide your hair into four manageable sections (front to back, ear to ear). This makes application faster and more even, ensuring the dye is on your hair for a similar duration across all sections.
4. Apply Systematically and Efficiently
Start applying the dye from the roots, where hair is virgin and often needs more processing time, working your way down to the ends. Apply quickly and evenly. Once you’re done applying to all sections, *that’s* when you start your timer based on your strand test or box instructions.
5. Use a Timer, Not a Guessing Game
Once your application is complete, immediately set a kitchen timer or phone timer for the exact duration determined by your strand test or the box instructions. Do not just “eyeball” it or guess.
6. Monitor During Processing (Especially with Bleach)
While you shouldn’t be constantly touching your hair, it’s a good idea to periodically check its progress, especially if you’re bleaching. If you notice a drastic change much sooner than expected, or if you feel any discomfort, rinse immediately.
7. Rinse Thoroughly and Condition
Once the timer goes off, rinse your hair with cool or lukewarm water until the water runs completely clear. Then, use the conditioner provided in the kit or a color-safe conditioner to seal the cuticle and add moisture.
Conclusion
Mastering “how long to leave hair dye in” is the cornerstone of successful at-home hair coloring. It’s not just about getting the color right; it’s about protecting the health and integrity of your hair. By diligently following the box instructions, understanding the nuances of your hair type, and never, ever skipping that crucial strand test, you empower yourself to achieve stunning, vibrant, and healthy-looking results every time.
Remember, hair coloring is both an art and a science. Take your time, be patient, and trust the process. With these guidelines in hand, you can confidently embark on your next hair transformation, knowing you’re well-equipped to manage the timing and enjoy beautiful, predictable outcomes. Happy dyeing!
Frequently Asked Questions
How do I know if my hair dye is ready?
The best way to know if your hair dye is ready is by performing a strand test before full application. For permanent dyes, the color typically looks darker while processing, but the strand test will reveal the final shade. For bleach, continuously monitor a strand visually until it reaches the desired lightness, keeping within the product’s maximum recommended time.
What happens if I leave hair dye in for an hour?
Leaving permanent hair dye in for an hour, especially if the box recommends 30-45 minutes, can lead to over-processing. This might result in a much darker or ashier color than intended, and significantly increase the risk of hair damage, dryness, and scalp irritation. Always adhere to the recommended maximum processing time.
Can I leave semi-permanent dye in longer for more vibrant color?
For semi-permanent dyes, leaving them in slightly longer than the minimum recommended time (e.g., 20 minutes instead of 10) can sometimes lead to more vibrant or saturated color, as they primarily coat the hair shaft. However, always stay within the maximum time specified by the manufacturer, as at some point, the dye stops depositing color effectively, and further exposure yields no additional benefit.
Will leaving hair dye in longer cover grays better?
While grays can be resistant, leaving permanent hair dye in longer than the recommended maximum time does not necessarily improve gray coverage and instead increases the risk of damage. For stubborn grays, ensure full saturation during application, consider a pre-softening treatment if recommended by the dye brand, and stick to the full recommended processing time on the box.
What if I forgot to set a timer for my hair dye?
If you forgot to set a timer, it’s best to err on the side of caution. If you suspect you’ve significantly overshot the recommended time, rinse immediately. If you’re unsure and think you might still be within a safe window, do a quick visual check on a strand for desired color, and if it looks ready or even slightly developed, rinse your hair thoroughly to prevent potential damage.
Is it bad to wash hair dye out too early?
Yes, washing hair dye out too early can result in under-processed hair. This means the color may not have fully developed, leading to a patchy, uneven, dull, or lighter-than-expected shade. In some cases, especially with bleach or toning, it can also leave unwanted brassy or yellow tones in your hair.