
How to Dry Curly Hair?
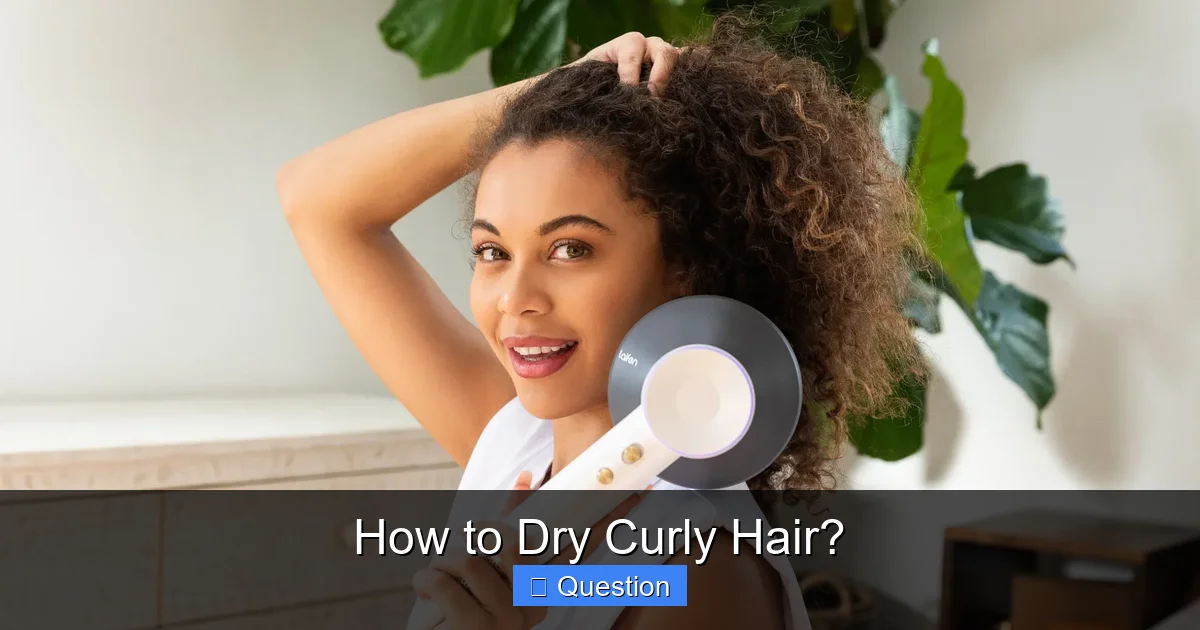
Drying curly hair correctly is crucial for achieving defined, frizz-free curls and maintaining their health. Traditional methods can cause damage and frizz, but by embracing gentle techniques like plopping with a microfiber towel and diffusing with low heat, you can enhance your natural curl pattern. Mastering these steps, from product application to breaking the cast, will transform your curly hair routine.
Oh, the glorious, unpredictable, and sometimes temperamental world of curly hair! If you’re blessed with beautiful waves, spirals, or coils, you know the struggle is real when it comes to wash day. We spend time meticulously cleansing, conditioning, and applying our favorite curl-defining products, only to face the ultimate challenge: how to dry curly hair without ending up with a frizzy mess.
It’s a common misconception that all hair drying methods are created equal. For us curly-haired folks, how we remove excess moisture from our strands makes all the difference between a good hair day and one spent battling rogue frizz. The good news? With the right techniques and tools, you can achieve stunning, defined, and healthy curls every single time. Let’s dive into the art and science of how to dry curly hair, transforming your routine from a chore into a celebration of your natural beauty.
Key Takeaways
- Gentle Drying is Key: Rough towel drying causes frizz and damage. Always use a microfiber towel or cotton t-shirt for plopping or scrunching to absorb excess water without disturbing the curl pattern.
- Diffusing for Definition and Volume: A diffuser attachment on a blow dryer, used on low heat and low speed, is a curly hair’s best friend. It dries curls gently, enhances definition, and adds volume without causing frizz.
- Plopping Reduces Drying Time and Frizz: Plopping is a technique where you wrap your wet hair in a microfiber towel or t-shirt, allowing it to absorb water and encourage curl formation, significantly reducing air or diffuser drying time.
- Product Application Matters: Apply your styling products (leave-in, curl cream, gel) to soaking wet hair immediately after showering to lock in moisture and definition before any drying begins.
- Minimize Touching Until Dry: Resist the urge to touch or scrunch your curls while they are drying. This will disrupt the curl pattern and lead to frizz. Only scrunch once your hair is 100% dry to “break the gel cast.”
- Air Drying is an Option, But Requires Patience: If opting for air drying, ensure your hair is well-hydrated and protected with styling products. Be prepared for longer drying times and follow a “hands-off” approach to avoid frizz.
📑 Table of Contents
- Why How You Dry Matters So Much for Curly Hair
- Pre-Drying Prep: The Foundation for Flawless Curls
- The Art of Gentle Drying: Towel Techniques
- Mastering the Diffuser: Your Best Friend for Defined Curls
- Air Drying vs. Diffusing: Which is Right for You?
- Post-Drying Perfection: Setting Your Curls for Success
Why How You Dry Matters So Much for Curly Hair
Before we get into the “how,” let’s understand the “why.” Curly hair is inherently drier than straight hair. Its unique structure, with open cuticles, makes it prone to moisture loss and, consequently, frizz. Traditional towel drying with a regular bath towel is one of the biggest culprits of frizz. The coarse fibers rough up the cuticle, leading to friction, damage, and that dreaded halo of flyaways.
Heat damage is another major concern. High heat from a blow dryer can strip away moisture, weaken the hair shaft, and permanently alter your curl pattern. Our goal when learning how to dry curly hair is to preserve moisture, encourage curl formation, and minimize any disturbance to the delicate curl pattern. By adopting gentle, curl-friendly drying methods, you’ll not only achieve better-looking curls but also contribute to the overall health and vitality of your hair.
Understanding Frizz: The Curly Hair Enemy
Frizz happens when the hair’s outer layer (the cuticle) is raised, allowing moisture from the air to penetrate and swell the hair shaft. This makes your hair appear puffy, undefined, and unruly. Rough handling, lack of moisture, and improper drying techniques are all major contributors. When you learn how to dry curly hair correctly, you’ll be actively working to keep that cuticle smooth and closed, locking in hydration and definition.
Pre-Drying Prep: The Foundation for Flawless Curls
The drying process actually begins in the shower! What you do before any drying technique even starts lays the groundwork for frizz-free, defined curls. Don’t skip these crucial steps!
Visual guide about How to Dry Curly Hair?
Image source: byrdie.com
Hydrate and Detangle While Wet
Curly hair loves moisture. Always apply a leave-in conditioner or curl cream to soaking wet hair, right after rinsing out your regular conditioner. This locks in hydration. While your hair is still saturated with water and product, gently detangle using a wide-tooth comb or your fingers. Start from the ends and work your way up to minimize breakage. This helps to group your curls together, preparing them for definition.
Apply Your Styling Products
This is critical for how to dry curly hair beautifully. After your leave-in, layer on your styling products – think curl cream, gel, or mousse. Apply these to dripping wet hair. Why wet? Because water helps distribute the product evenly and “clumps” your curls, promoting definition. Scrunch your products into your hair, working from the ends upwards, encouraging your curl pattern to form. Many curly-haired individuals follow the “squish to condish” method for maximum product absorption and curl formation.
The Art of Gentle Drying: Towel Techniques
Put down that terry cloth towel! It’s the enemy of frizz-free curls. The rough texture will rough up your cuticles and create a frizzy mess. When figuring out how to dry curly hair gently, you need a different tool.
Microfiber Towels or Cotton T-Shirts: Your Curl’s Best Friend
Instead of a regular towel, reach for a microfiber towel or an old cotton t-shirt. Both are much smoother and will absorb excess water without causing friction or frizz. They are essential for protecting your delicate curl pattern.
Plopping: The Game-Changing Technique
Plopping is a fantastic technique for how to dry curly hair while encouraging curl definition and significantly reducing drying time. Here’s how to do it:
- Lay it Out: Lay your microfiber towel or cotton t-shirt flat on a bed or counter.
- Flip and Plop: Gently flip your head over, allowing all your hair to “plop” into the center of the towel/t-shirt, accordion-style.
- Wrap it Up: Bring the back of the towel/shirt up to your neck, then grab the corners and tie or twist them securely around your head, creating a turban.
- Wait: Leave your hair plopped for 15-30 minutes, or even longer if you have very thick hair. This allows the towel to absorb excess water and encourages your curls to coil up.
- Unwrap Gently: Carefully unwrap your hair, gently shaking it out without disturbing the curl clumps.
Micro-Plopping and Scrunching
If full plopping isn’t for you, or you need to remove a bit more moisture after unwrapping, try micro-plopping. This involves gently scrunching sections of your hair with a microfiber towel or t-shirt, squeezing out excess water without rubbing. This helps maintain curl integrity and is a key step in how to dry curly hair for definition.
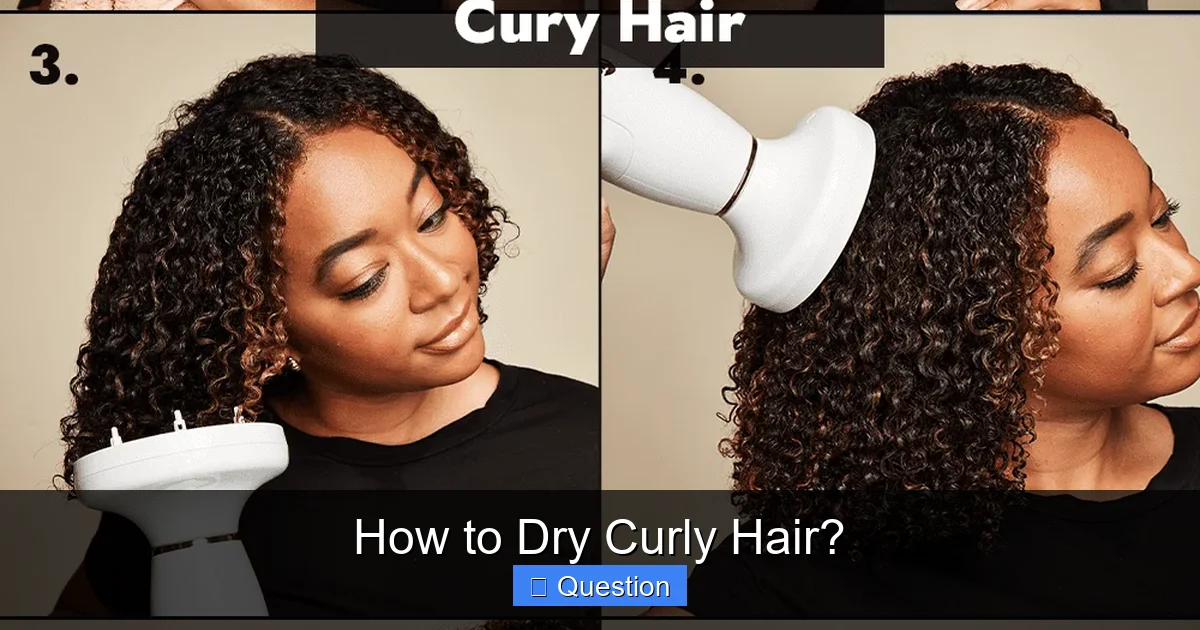
Mastering the Diffuser: Your Best Friend for Defined Curls
A diffuser attachment for your blow dryer is a curly-haired person’s secret weapon for volume and definition. It disperses the airflow, preventing the strong blast that causes frizz and instead gently dries your curls.
Choosing the Right Diffuser and Settings
Most diffusers come with “fingers” that lift and separate your hair, adding volume at the roots. When using your blow dryer, always opt for the lowest heat setting and the lowest speed setting. High heat and speed are frizz generators.
The Diffusing Technique: Hover and Pixie Diffusing
Learning how to dry curly hair with a diffuser takes a little practice, but it’s worth it!
- Pre-Dry Slightly: After plopping or micro-plopping, your hair should be damp, not dripping.
- Hover Diffusing: Start by gently hovering the diffuser around your head without touching your hair. This helps to dry the outer layer of your curls and reduce overall drying time.
- Pixie Diffusing (or “Scrunch” Diffusing):
- Tilt your head to the side.
- Gently scoop a section of your hair into the diffuser bowl, bringing the diffuser up to your scalp.
- Hold it there for 30-60 seconds, allowing the heat to set the curl pattern. Avoid moving the diffuser around while it’s in contact with your hair.
- Turn off the dryer, remove the diffuser, and move to the next section. Turning off the dryer prevents disturbing the curls with a blast of air when you move the diffuser.
- Repeat this process all over your head, focusing on the roots for volume and the ends for definition.
- Dry to About 80-90%: Don’t try to dry your hair 100% with the diffuser, especially if you have very long or thick hair. Leave it slightly damp to minimize potential heat damage and allow for a natural finish.
- Flip and Fluff: Once mostly dry, gently flip your head over and scrunch out any remaining dampness or to add extra root volume.
Air Drying vs. Diffusing: Which is Right for You?
Both air drying and diffusing are popular methods for how to dry curly hair. The best choice often depends on your hair type, lifestyle, and desired results.
Air Drying: Patience is a Virtue
Air drying is the most gentle method as it involves no heat. However, it requires patience and can take several hours, especially for dense or long curls. If you choose to air dry:
- Product is Paramount: Use plenty of leave-in, curl cream, and a strong-hold gel to lock in definition and moisture.
- Hands Off: Once you’ve applied products and done any initial plopping, resist touching your hair until it’s completely dry. Any disturbance will lead to frizz.
- Climate Considerations: Air drying works best in low-humidity environments. High humidity can lead to more frizz.
- Positioning: You can try clipping your roots for volume while air drying or putting your hair in a pineapple (loose high ponytail) to prevent flattening the curls at the back of your head.
Diffusing: Speed and Volume
Diffusing is faster than air drying and offers more control over volume and definition. It’s excellent for:
- Faster Results: If you don’t have hours to wait for your hair to air dry.
- Volume: The diffuser fingers help lift roots and create impressive volume.
- Definition: The gentle, controlled drying sets your curl pattern beautifully.
- All Hair Types: Works well for waves, loose curls, and tight coils.
Many curly-haired individuals use a combination: plopping for 15-30 minutes, then diffusing until 80-90% dry, and finally letting it air dry the rest of the way. This is often the sweet spot for how to dry curly hair efficiently and effectively.
Post-Drying Perfection: Setting Your Curls for Success
You’ve successfully navigated how to dry curly hair – but you’re not quite done yet! The final steps ensure your curls look their best and last longer.
Breaking the Gel Cast (“Scrunch Out The Crunch”)
If you used a strong-hold gel, your curls might feel a bit stiff or “crunchy” once dry. This is called a gel cast, and it’s a good thing! It means the gel did its job of holding your curl pattern. To break the cast:
- Ensure 100% Dryness: Do not break the cast until your hair is completely dry. If it’s even slightly damp, you’ll introduce frizz.
- Apply a Lightweight Oil: Put a few drops of a lightweight oil (like argan, jojoba, or grapeseed oil) on your palms. This helps to soften the cast and adds shine.
- Scrunch Gently: Flip your head over and gently scrunch your curls from the ends up towards the roots. You’ll hear and feel the cast breaking. Continue until your hair feels soft and bouncy.
Fluffing for Volume
After breaking the cast, you might want to add a little more volume, especially at the roots. Gently lift your hair at the roots with your fingers, being careful not to disturb the curl clumps too much. A pick can also be used to lift roots without separating curls.
Protecting Your Curls Overnight
To preserve your hard work and extend the life of your curls:
- Pineapple Your Hair: Gather your curls into a loose, high ponytail or bun on top of your head. This prevents them from being flattened while you sleep.
- Silk or Satin Pillowcase/Bonnet: Switch to a silk or satin pillowcase or wear a silk bonnet. These materials reduce friction, which means less frizz and less tangling compared to cotton.
Mastering how to dry curly hair is a journey, not a destination. It involves understanding your hair’s unique needs, experimenting with different techniques, and finding the combination that works best for you. Don’t be afraid to try new products or adjust your routine based on the weather or your hair’s mood. With patience and these expert tips, you’ll unlock the secret to consistently gorgeous, healthy, and defined curls that you’ll absolutely love to show off!
Frequently Asked Questions
How long does it take to dry curly hair with a diffuser?
Drying curly hair with a diffuser can take anywhere from 15 to 45 minutes, depending on your hair’s length, thickness, and porosity. Using low heat and low speed, you’ll likely dry your hair to about 80-90% in this timeframe, allowing it to air dry the rest of the way.
Can I just air dry my curly hair?
Yes, you can absolutely air dry your curly hair! It’s the gentlest method as it uses no heat. However, it typically takes much longer than diffusing and requires careful product application and a “hands-off” approach to minimize frizz.
What is plopping, and why is it good for curly hair?
Plopping is a technique where you wrap your wet, product-applied curly hair in a microfiber towel or cotton t-shirt. It’s beneficial because it absorbs excess water without roughing up the cuticles (reducing frizz) and encourages your curls to coil and set in their natural pattern, speeding up overall drying time.
Should I scrunch my curly hair while it’s drying?
It’s best to avoid scrunching your curly hair while it’s drying, as this can disrupt the forming curl pattern and lead to frizz. Only scrunch your hair once it’s 100% dry to “break the gel cast” and reveal soft, defined curls.
What kind of towel should I use to dry curly hair?
For drying curly hair, you should always use a microfiber towel or an old cotton t-shirt instead of a traditional terry cloth towel. These materials are smoother, absorb water gently, and prevent the friction that causes frizz and damages the curl cuticle.
How can I reduce frizz when drying my curly hair?
To reduce frizz when drying curly hair, focus on gentle techniques like plopping with a microfiber towel, using a diffuser on low heat and low speed, and avoiding touching your hair until it’s completely dry. Ensuring your hair is well-hydrated with leave-in conditioner and a good gel also helps to seal the cuticle and prevent frizz.