
How to Dye Hair with Kool Aid?
Looking for a fun, temporary way to add a splash of color to your locks? Dyeing your hair with Kool-Aid is a fantastic, chemical-free, and super affordable option! Perfect for light hair, this method offers vibrant, semi-permanent results that are easy to achieve at home, making it a popular choice for festivals, parties, or just a playful change.
Ever gazed in the mirror and wished for a sudden splash of vibrant, unapologetic color in your hair? Maybe you’re dreaming of electric blue streaks, fiery red tips, or playful purple strands, but without the commitment or chemicals of traditional hair dyes. Well, get ready for a nostalgic trip down the beverage aisle, because learning how to dye hair with Kool Aid might just be the quirky, fun, and totally temporary solution you’ve been searching for!
Dyeing your hair with Kool Aid is a popular DIY trend that offers a surprisingly effective way to add a burst of semi-permanent color to your locks. It’s a fantastic option for experimenting with bold hues for festivals, themed parties, or simply to add a whimsical touch to your everyday look. Plus, it’s incredibly budget-friendly and free from the harsh chemicals often found in commercial dyes, making it a gentler choice for your hair.
So, if you’re curious about turning your hair into a canvas of temporary brilliance, you’ve come to the right place. We’re going to walk you through everything you need to know about how to dye hair with Kool Aid, from choosing your colors to application techniques and aftercare. Let’s get colorful!
Key Takeaways
- Temporary Fun: Kool-Aid hair dye offers a semi-permanent color that typically fades within a few washes, making it ideal for temporary style changes without long-term commitment.
- Best for Lighter Hair: The vibrant pigments in Kool-Aid show up most vividly on blonde, light brown, or pre-lightened hair. Darker hair may only achieve a subtle tint or no visible change.
- Chemical-Free Option: Unlike traditional dyes, Kool-Aid contains no harsh chemicals like ammonia or peroxide, making it a gentler alternative for your hair.
- Affordable & Accessible: You likely have Kool-Aid packets in your pantry, or they’re readily available and inexpensive, making this a very budget-friendly dyeing method.
- Preparation is Key: Thoroughly washing your hair, protecting your skin and surroundings, and properly mixing the Kool-Aid solution are crucial steps for successful application and stain prevention.
- Application Varies: You can dip sections of hair for ombré effects or apply the mixture directly with a brush for full coverage, allowing flexibility in your desired look.
- Rinsing & Care: Rinse with cool water until it runs clear, and be mindful that color may transfer when wet. Gentle washing and conditioning will help maintain your new hue.
📑 Table of Contents
Why Choose Kool-Aid for Hair Dyeing?
Before we dive into the nitty-gritty of the process, let’s chat about why Kool-Aid has become such a beloved, unconventional hair dye.
The Allure of Temporary Color
One of the biggest draws of using Kool-Aid for hair dyeing is its temporary nature. Unlike permanent dyes that require significant commitment and often professional help to change or remove, Kool-Aid offers a commitment-free color experience. The vibrant shades typically fade over a few washes, giving you the freedom to experiment without long-term consequences. This makes it perfect for those who like to frequently change their look or for special occasions where a bold statement is desired.
Gentle on Your Strands
Traditional hair dyes often contain strong chemicals like ammonia and peroxide, which can be harsh on your hair, leading to dryness, damage, or breakage over time. Kool-Aid, on the other hand, is designed for consumption, not hair coloring, meaning it’s free from these aggressive ingredients. It works by staining the outer layer of the hair shaft rather than penetrating it deeply, resulting in a gentler process that’s less likely to cause damage. This is a huge plus for those with sensitive scalps or hair that’s already prone to dryness.
Budget-Friendly Fun
Let’s be real, professional hair coloring can be expensive. Even at-home dye kits can add up. Kool-Aid packets, however, are incredibly affordable, usually costing less than a dollar each. This makes learning how to dye hair with Kool Aid an incredibly economical way to achieve a vibrant, fun look. You can mix and match colors without breaking the bank, allowing for even more creative freedom.
What You’ll Need: Gathering Your Supplies
Preparation is key for any successful DIY project, and dyeing your hair with Kool-Aid is no exception. Before you begin, gather all your materials to ensure a smooth, mess-free process.

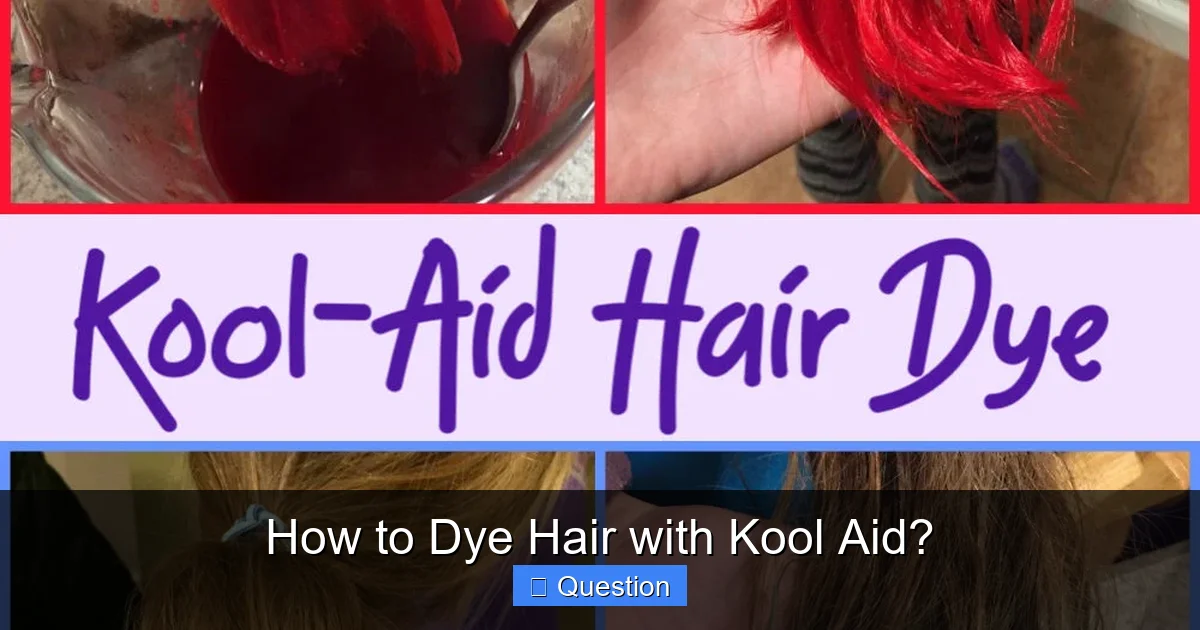
Visual guide about How to Dye Hair with Kool Aid?
Image source: pyxis.nymag.com
The Star of the Show: Kool-Aid
- Unsweetened Kool-Aid Packets: This is crucial! Sweetened Kool-Aid contains sugar that can make your hair sticky and harder to rinse. Always opt for the unsweetened variety.
- Color Choices: Red, blue, purple, and cherry are known to produce the most vibrant results, especially on lighter hair. Think about the shade you want and how it might combine if you’re mixing. For example, red and blue can create purple.
Essential Tools for Application
- Bowl (Non-Metallic): A glass or plastic bowl is ideal for mixing your Kool-Aid solution. Metal bowls can sometimes react with the dye.
- Stirring Utensil: A plastic spoon or whisk.
- Gloves: Disposable plastic or latex gloves are a must to protect your hands from staining.
- Applicator Brush or Squeeze Bottle: For precise application, especially if you’re doing streaks or ombré. An old toothbrush can also work for small sections.
- Clips or Hair Ties: To section your hair during application.
- Towel (Old & Dark): A towel you don’t mind getting stained. Have several on hand.
- Hot Water: To dissolve the Kool-Aid powder.
- Conditioner (Optional, but Recommended): A dollop of white conditioner can help create a thicker paste for easier application and add some nourishing benefits.
- Vinegar (Optional): Some people add a splash of white vinegar to help set the color, but it’s not strictly necessary.
Protection is Key
- Old Clothes: Wear clothes you won’t mind getting stained.
- Newspaper or Plastic Sheeting: Cover your workspace (bathroom counter, floor) thoroughly to prevent permanent stains.
- Petroleum Jelly or Vaseline: To apply along your hairline, ears, and neck to prevent skin staining.
Preparing Your Hair and Workspace
A little prep goes a long way in ensuring your Kool-Aid hair dyeing experience is successful and mess-free.
Hair Preparation for Best Results
For the most vibrant color, start with clean, dry hair. Wash your hair with shampoo, but skip the conditioner right before dyeing, as conditioner can create a barrier that prevents the dye from fully absorbing. Towel-dry your hair until it’s damp, or completely dry if you prefer a more intense, longer-lasting stain. The drier your hair, generally the more concentrated the color will be. Keep in mind that Kool-Aid colors show up best on lighter hair shades (blonde, light brown, bleached hair). Darker hair may only get a subtle tint or no noticeable change.
Protecting Your Surroundings
Kool-Aid is designed to stain, so it will stain surfaces, clothes, and skin! Lay down plenty of newspaper, old towels, or plastic sheeting on your counter, floor, and sink area. Wear old clothes that you don’t mind sacrificing. Apply a thick layer of petroleum jelly or Vaseline along your hairline, ears, and neck to create a barrier against skin staining. Don’t forget those gloves!
The Perfect Kool-Aid Concoction
Now for the fun part: mixing your dye! The general rule of thumb is to use 2-3 packets of unsweetened Kool-Aid for every cup of hot water. If you have very thick or long hair, you might need more. If you’re using conditioner, start with 1-2 packets per few tablespoons of conditioner to create a thick paste, adding water if needed for a thinner consistency.
- For Dipping (Tips/Sections): In a non-metallic bowl, dissolve 2-3 packets of Kool-Aid in about 1 cup of very hot (not boiling) water. Stir well until all powder is dissolved. You can add a tablespoon of white vinegar here if desired.
- For Full Coverage/Painting: For a thicker, more manageable paste, mix 2-3 packets of Kool-Aid powder with a few tablespoons of white conditioner. Add a tiny bit of hot water until you reach a consistency similar to yogurt – thick enough to cling to your hair but spreadable.
Step-by-Step Guide: How to Dye Hair with Kool Aid
Alright, gloves on, workspace covered, and concoction mixed! It’s time to learn how to dye hair with Kool Aid, step by colorful step.
Sectioning Your Hair
Just like with any hair dyeing process, sectioning your hair will make application much easier and more even. Use clips or hair ties to divide your hair into manageable sections. If you’re doing just the tips, isolate those sections. For full coverage, divide your hair into four main quadrants.
Application Techniques (Dipping vs. Painting)
Choose the application method that suits your desired look:
- Dipping (for Ombré, Streaks, or Tips): This is the easiest method for targeted color. Submerge the desired sections of your hair directly into the Kool-Aid solution in your bowl. Make sure the hair is fully saturated.
- Painting (for Full Coverage or Highlights): For more precise application, use an applicator brush or an old toothbrush. Scoop or squeeze the Kool-Aid mixture onto small sections of your hair, working from root to tip (or wherever you want the color). Ensure even saturation. If you’re using the conditioner paste, paint it on generously.
The Waiting Game
Once your hair is saturated, it’s time to let the magic happen! The longer you leave the Kool-Aid on, the more intense and long-lasting the color will be.
- For subtle tint: 30 minutes to 1 hour.
- For vibrant color: 2-4 hours.
- For maximum intensity: Wrap the colored sections in plastic wrap or foil (to prevent dripping and keep the mixture damp) and leave it on overnight. This is especially recommended for darker hair trying to achieve any noticeable color.
During this time, you can also use a hairdryer on a low setting over the wrapped sections to help the color penetrate more effectively, though this is optional.
Rinsing and Revealing
Once you’re satisfied with the processing time, it’s time for the big reveal!
- Rinse with cool water: Head to the sink (or shower if you’re careful about splashing). Rinse your hair with cool water, away from your face, until the water runs mostly clear. Avoid hot water, as it can strip the color.
- No Shampoo (Initially): Try to avoid shampooing your hair immediately after rinsing, as this can wash out a lot of the freshly deposited color. A light conditioner can be used to help detangle and add moisture.
- Towel Dry Gently: Use an old towel to gently squeeze excess water from your hair. Be aware that even after rinsing, some color may still transfer to towels, pillows, and clothing, especially when your hair is wet.
And there you have it! Your newly Kool-Aid dyed hair, ready to show off!
Tips for Success and Troubleshooting
Knowing how to dye hair with Kool Aid is one thing, but getting the best results and fixing any hiccups is another. Here are some extra tips.
Achieving Vibrant Color
- Start Light: Remember, Kool-Aid works best on light blonde, bleached, or light brown hair. Darker hair will yield very subtle results, if any.
- More Powder, Less Water: A concentrated solution means more pigment. Don’t be shy with the Kool-Aid packets.
- Longer Processing Time: The longer the mixture sits on your hair, the more intense the color will be. Overnight is often best for maximum vibrancy.
- Heat Helps: Applying gentle heat with a hairdryer can help open the hair cuticle slightly, allowing for better color absorption.
Making It Last (or Fade)
- To prolong color: Wash your hair less frequently, use cool water, and sulfate-free shampoos and conditioners. Avoid excessive sun exposure and chlorine, which can fade color quickly.
- To fade color: Wash more frequently with clarifying or anti-dandruff shampoos. Warm water and extended time in the sun or chlorinated pools will also accelerate fading. A mixture of baking soda and shampoo can also help strip the color faster.
Dealing with Uneven Color
If your color comes out patchy, it’s likely due to uneven application or not fully saturating sections of hair. You can reapply the Kool-Aid mixture to the lighter areas and leave it on for a shorter time, carefully blending it in. For future applications, ensure every strand in the desired section is thoroughly coated.
Lightening or Removing the Color
Because Kool-Aid stains are temporary, they will naturally fade over time. However, if you want to speed up the process:
- Clarifying Shampoo: Wash your hair several times with a clarifying or anti-dandruff shampoo.
- Baking Soda Paste: Mix baking soda with a little water to form a paste, apply it to your hair, let it sit for 5-10 minutes, then rinse.
- Vitamin C Treatment: Crush a few Vitamin C tablets and mix them with a small amount of shampoo to form a paste. Apply to hair, leave for 30 minutes, then rinse.
These methods can help strip the color faster without damaging your hair.
Safety First: Important Considerations
While dyeing your hair with Kool Aid is generally safe, there are a few important things to keep in mind to ensure a positive experience.
Patch Test is Your Best Friend
Even though Kool-Aid is food-grade, it’s always wise to perform a patch test before applying it all over your hair. Apply a small amount of the mixed solution to an inconspicuous area of your skin (like behind your ear or on your inner arm). Wait 24 hours to check for any allergic reactions or irritation. This step, while often skipped, is crucial for peace of mind.
Avoiding Stains
We’ve said it before, and we’ll say it again: Kool-Aid stains! Protect everything! Your skin, clothes, towels, bathroom surfaces – anything it touches can potentially get permanently stained. Be meticulous with your petroleum jelly, old towels, and plastic covers. If you do get a stain on your skin, rubbing alcohol or a baking soda paste can sometimes help remove it. For surfaces, try cleaning it immediately with bleach or a stain remover, depending on the material.
Not for Everyone
While most people can safely use Kool-Aid on their hair, it’s not suitable for everyone. If you have very damaged, extremely porous, or recently chemically treated hair (like a fresh perm or relaxer), the color might absorb unevenly or be harder to remove. Always err on the side of caution. If you have any concerns, consult with a hair professional.
There you have it – a comprehensive guide on how to dye hair with Kool Aid, transforming your locks with a splash of temporary, vibrant color!
Dyeing your hair with Kool-Aid is an exciting, low-risk way to experiment with bold new looks. It’s a fantastic option for those who crave a pop of color without the long-term commitment or the harsh chemicals of traditional dyes. Whether you’re aiming for mermaid blues, fiery reds, or mystical purples, this method offers a playful and budget-friendly path to hair transformation. Remember to have fun, be creative, and don’t be afraid to try out different shades. Your hair is your canvas – enjoy painting it with a little Kool-Aid magic!
Frequently Asked Questions
How long does Kool-Aid hair dye last?
Kool-Aid hair dye is semi-permanent and typically lasts anywhere from a few washes to a couple of weeks, depending on your hair’s porosity, how intensely you applied the color, and your hair washing habits. Lighter hair tends to hold the color longer than darker hair.
Does Kool-Aid hair dye work on dark hair?
Kool-Aid works best on light blonde, bleached, or light brown hair, where the colors will appear most vibrant. On dark hair, you might achieve a very subtle tint that’s only noticeable in bright sunlight, or possibly no visible change at all.
Is dyeing hair with Kool-Aid safe for my hair?
Yes, dyeing hair with Kool-Aid is generally considered safe as it doesn’t contain harsh chemicals like ammonia or peroxide found in traditional dyes. It primarily stains the outer layer of the hair shaft, making it a gentler alternative.
Can I mix different Kool-Aid flavors to create custom colors?
Absolutely! You can experiment by mixing different unsweetened Kool-Aid flavors to create unique custom shades. For example, mixing red and blue can give you purple, while yellow and blue can create green. Test a small amount first to see the resulting color.
How do I make the Kool-Aid color fade faster if I don’t like it?
To speed up fading, wash your hair more frequently with clarifying or anti-dandruff shampoos, which are designed to strip buildup and color. Warm water also helps. You can also try a baking soda paste mixed with shampoo or a Vitamin C treatment.
Will Kool-Aid hair dye stain my skin or bathroom?
Yes, Kool-Aid is designed to stain and can easily stain skin, clothes, towels, and porous bathroom surfaces. Always wear gloves, old clothes, and protect your hairline with petroleum jelly, and cover your workspace thoroughly to prevent unwanted stains.